Hey there,
This post is in continuation to my previous post "Getting started with Snort" (http://piu28.blogspot.in/2015/05/getting-started-with-snort-on-ubuntu.html). In this post, i am gonna describe how to set the custom rules and enable NIDS mode in Snort. For its installation and configuration, please visit my previous post.
Snort allows you to write rules describing
- well-known and common vulnerability exploitation attempts
- violations of your security policy
- conditions under which you think a network packet might be anomalous
A snort rule consists of two basic parts: the rule header and options for the rule. The rule header contains the action to perform, the protocol that the rule applies to, and the source and destination addresses and ports. The rule option allows you to create a descriptive message and also contains information about which parts of the packet you should inspect to determine if you should take the rule action.
Here's a general form of a Snort Rule:
action proto src_ip src_port direction dst_ip dst_port (options)
when a packet comes in, its source and destination IP addresses and ports are then compared to the rules in the ruleset. If any of them are applicable to the packet, then the options are compared to the packet. If all of these comparisons return a match, then the specified action is taken.
So now i am gonna create a custom rule by which if any of my virtual machine is accessing Facebook, an alert will generate.
- Move into the directory /etc/snort/rules by running the command: cd /etc/snort/rules
- List the contents of the rules directory by running the command ls:
- Create your custom rule by running the command "sudo pico zzalert.rules". (you can give any name to your custom rule in place of zzalert.rules). A blank screen something like below will open up:
- Now, write the custom rule in the space provided. Run the command: alert tcp any any -> any any (content:"www.facebook.com";msg:"Someone is accessing Facebook!!"; sid:1000001;)
- Press ctrl+X to save the changes. Press Enter. After saving the changes, list the rules again and you will see your custom rule in that list.
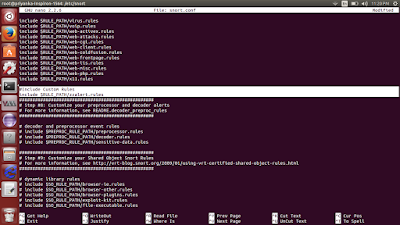
- Also, set the rule path to the configuration file snort.conf. Run the command: sudo pico /etc/snort/snort.conf
- Scroll down to step 7: Customise the rule path. Add the path to your rule: include $RULE_PATH/zzalert.rules
- Save the changes made to snort.conf and run the Snort in NIDS mode from the root terminal: snort -A console -c /etc/snort/snort.conf -l /var/log/snort/ -K ascii
- Now, from my Windows virtual machine, i typed the address www.facebook.com in the URL.
- Snort started to generate the alerts as shown below:
"Hope it helps someone to initiate with Snort Custom Rule..!! Do let me know if it does..!! "
Thankyou..!! :-)


No comments:
Post a Comment